


Exhibit A: This is my we picture {this} entry!
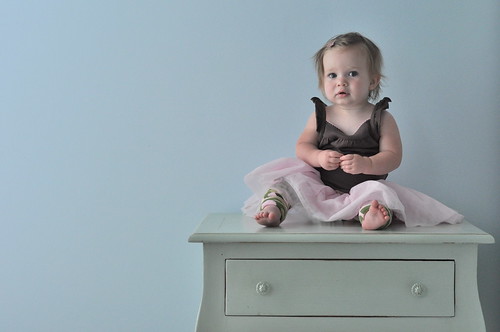
Here is a photo I took a couple days ago. As you can see, the lighting is all wrong but I knew that when I took it. This photo was taken in my bedroom, in the evening when there wasn't much light. I had to bump up my ISO setting to 800 just to get a decent amount of light to get this shot. The high ISO gives it some added noise but in the final edit I think it works.
(SOOC)
Nikon d90
50mm f/1.8 lens
shutter speed 1/200
f/4
ISO 800
no flash
In hindsight I realize that some of these settings could have been adjusted instead of bumping up the ISO but sometimes children won't sit still long enough for all that. Next time I'll adjust my settings before positioning the baby!
~open the photo in Photoshop Cs3
~I liked the composition of this photo SOOC so no cropping was needed
~adjust the white balance using the white dropper in Levels
~run the Perfect Portrait action from CoffeeShop and then adjust the sliders w/in the action to my liking (don't remember the specific #s although I do know I put the vignette at 100% opacity)
~I used the paintbrush to brush over her eyes at 11% opacity just to brighten them up a bit
~run the Dreamy Soft Diffusion action from CoffeeShop and adjust the sliders again to my liking. Running both of these actions together can make your photo too bright so you need to lower the opacity of the Light levels so you don't have a blown out photo. The Dreamy Soft Diffusion action gives a nice softness that is perfect for the mood of this photo.
~lastly I clicked the filter tab, selected noise, and then clicked on despeckle to reduce the grain in the photo a bit. I will most likely print this photo as a 5x7 and place it on the very nightstand she is sitting on.
And WhaLaa! There you have it... a frame-worthy photograph!
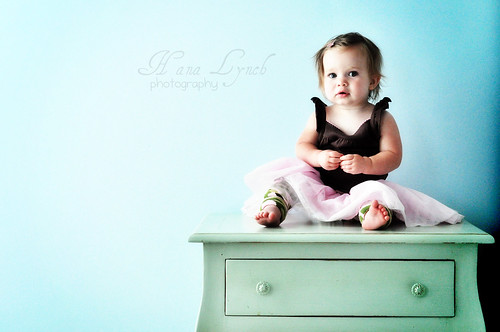
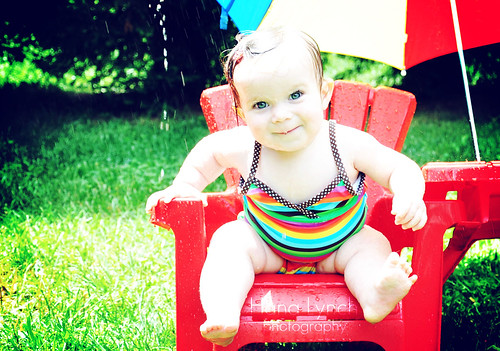
Exhibit B:
Here is a photo I took over Memorial Day Weekend. It was taken around 2pm when the sun was high in the sky and there were shadows and blowouts galore...not ideal for picture taking. When I was looking through my photos later that day I saw some potential in this one.
(SOOC)

Nikon d90
18-105mm f/3.5-5.6G lens
shutter speed 1/200
f/5.6
ISO 100
~open photo in Photoshop
~crop photo to get desired composition
~run Fresh & Colorful action from Pioneer Woman
~adjust sliders to achieve desired look
~run Bright Eyes action from CoffeeShop
~brush over eyes at 11% opacity to brighten eyes
~run NW Retro action from Jean Photography. This action is what gives the red chair that great fire engine red color! I love this action! It fits this photo perfectly!
And there you have it! A beautiful representation of summer worthy of a spot on the wall!!
To see more great "Before & After" photos or to enter your own visit we picture {this}!

Wow, these are just amazing pictures. I especially LOVE your first one. Awesome work!
ReplyDeletemaybe you could teach me? i have the 40, not the mac daddy like you, but can't figure anything out! help! :)
ReplyDeleteI LOVE your first one. I love the simplicity of it, yet stunning. Great job! What a cute little model, too!
ReplyDeleteCute! Cute! Cute!! I love the first one, how did you get the wall to turn that beautiful aqua blue? Did the actions do that?Gorgeous pictures and models!!
ReplyDeleteThank you for the sweet comment on my blog!!
Great work, Hana. You def practice the rule of thirds. And I totally hear you on not having time to simply bump up the ISO; sometimes the kiddos are just oo quick!
ReplyDeleteOh, btw, I typed out a long {and I mean l-o-n-g} email to you last week at work and one of the math profs cleared it out right before I got to send it. I was so aggravated! I will retype it tomorrow.
You totally inspired me!!
ReplyDeleteI've been researching editing software for a while now and was all confused if I should buy lightroom or elements or the CS3. Up until now I've just been using a couple of free softwares I downloaded - photoscape and picasa. Well, after reading your post, today I bought the Photoshop CS3! So excited! :)
Jill
AWESOME editing in both examples.... you have an AMAZING eye!!! I love how you post processed for the individual photograph - enhancing them to really bring out the best in each one. Well done!
ReplyDeleteGreat tutorial and loved the images.
ReplyDeleteB Dad
Those are seriously amazing. Thanks for sharing your tips! I have been putting off buying photoshop but these pictures are inspiring me to just go buy it!
ReplyDeleteGreat job on both shots. I really liked your first image both times and then the edited versions just blew me away. Amazing work!
ReplyDeleteOkay, I'm definately going to use my daughter's dresser as a prop in a photo soon! What a fantastic idea! And I love what you did with the wash of color! Brilliant! I get the best ideas from my bloggy friends!
ReplyDeleteDonna
Our blog: Double Happiness!
absolutely beautiful. I really love the colors on the first photo - great pp!
ReplyDeleteFANTASTIC!
ReplyDeletebeautiful processing on both!
ReplyDeleteAbsolutely great pictures and edits!!!
ReplyDeleteWhere did you find "Dreamy Soft Diffusion"? I'm searching Coffee Shop and I'm not finding it. Do you have a direct link?
ReplyDeleteThanks so much!! I LOVE LOVE LOVE the blue wall and vignette on the top photo.