Today I am going to show you how I turn an ok picture into a frame-worthy photograph using a few steps in Photoshop. First off let me say that when I take photos I strive to get a fantastic shot SOOC (straight out of camera). However, there are times when the lighting is terrible or times when I'm just taking simple snapshots but find one that has the potential to be so much more. Today I am going to show you two such examples. Keep in mind that I am NO Photoshop expert...in fact, I don't really claim to know what I am doing at all. I simply read a lot of photography blogs and have picked up quite a few things on the internet to help me along the way. I realize that there are many tools in Photoshop that I could use to help me tweak my photos even more. However, in my 2 months of taking photos with a dSLR and my 1 month of Photoshop experimenting this is what I've learned.
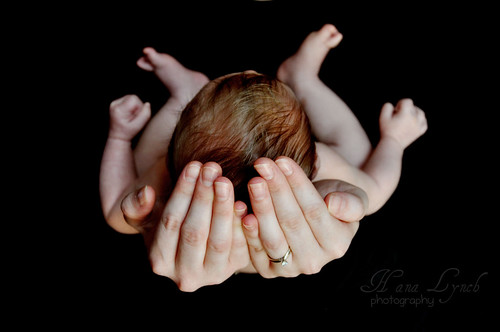
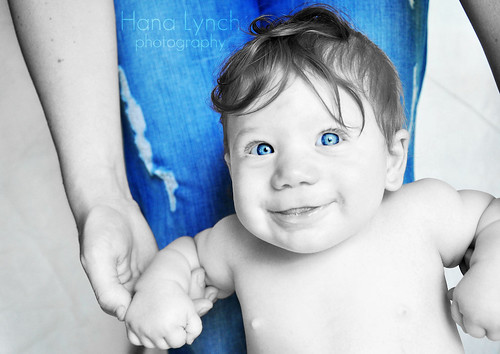
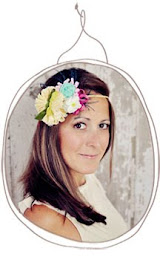
Exhibit A: This is my
we picture {this} entry!
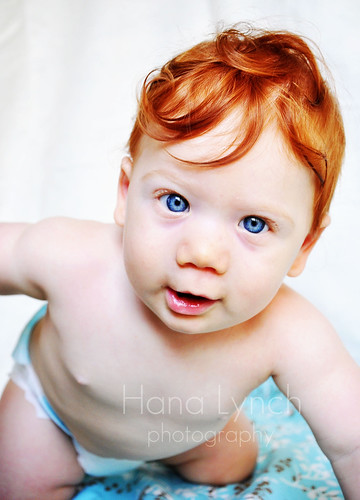
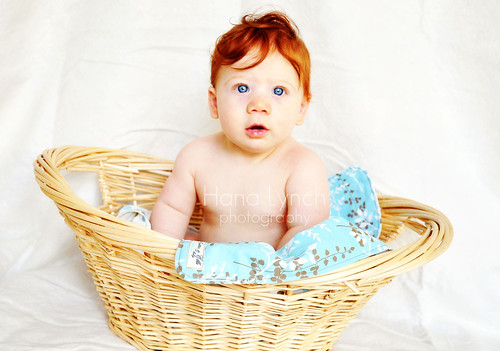
Here is a photo I took a couple days ago. As you can see, the lighting is all wrong but I knew that when I took it. This photo was taken in my bedroom, in the evening when there wasn't much light. I had to bump up my ISO setting to 800 just to get a decent amount of light to get this shot. The high ISO gives it some added noise but in the final edit I think it works.
(SOOC)
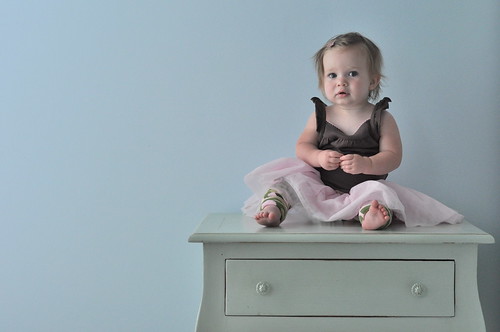
Nikon d90
50mm f/1.8 lens
shutter speed 1/200
f/4
ISO 800
no flash
In hindsight I realize that some of these settings could have been adjusted instead of bumping up the ISO but sometimes children won't sit still long enough for all that. Next time I'll adjust my settings before positioning the baby!
~open the photo in Photoshop Cs3
~I liked the composition of this photo SOOC so no cropping was needed
~adjust the white balance using the white dropper in Levels
~run the Perfect Portrait action from
CoffeeShop and then adjust the sliders w/in the action to my liking (don't remember the specific #s although I do know I put the vignette at 100% opacity)
~I used the paintbrush to brush over her eyes at 11% opacity just to brighten them up a bit
~run the Dreamy Soft Diffusion action from
CoffeeShop and adjust the sliders again to my liking. Running both of these actions together can make your photo too bright so you need to lower the opacity of the Light levels so you don't have a blown out photo. The Dreamy Soft Diffusion action gives a nice softness that is perfect for the mood of this photo.
~lastly I clicked the filter tab, selected noise, and then clicked on despeckle to reduce the grain in the photo a bit. I will most likely print this photo as a 5x7 and place it on the very nightstand she is sitting on.
And WhaLaa! There you have it... a frame-worthy photograph!
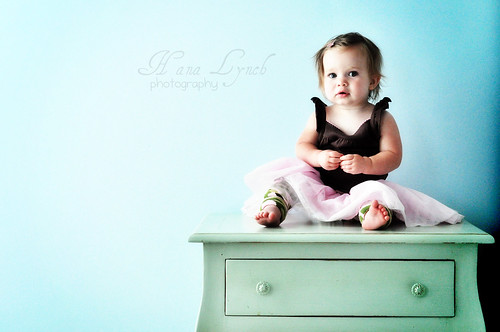
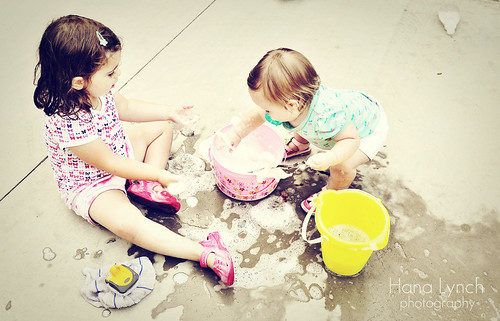
Exhibit B:
Here is a photo I took over Memorial Day Weekend. It was taken around 2pm when the sun was high in the sky and there were shadows and blowouts galore...not ideal for picture taking. When I was looking through my photos later that day I saw some potential in this one.
(SOOC)
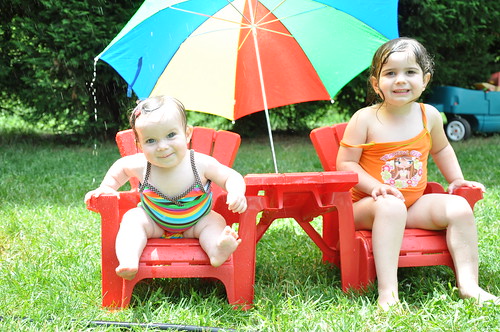
Nikon d90
18-105mm f/3.5-5.6G lens
shutter speed 1/200
f/5.6
ISO 100
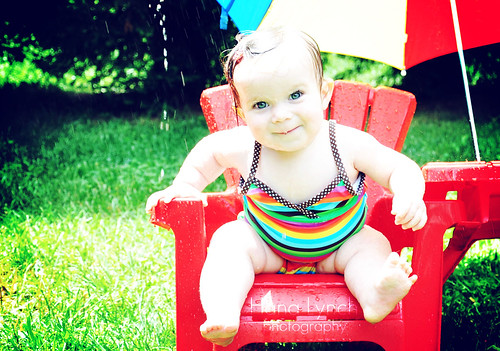
~open photo in Photoshop
~crop photo to get desired composition
~run Fresh & Colorful action from
Pioneer Woman~adjust sliders to achieve desired look
~run Bright Eyes action from
CoffeeShop~brush over eyes at 11% opacity to brighten eyes
~run NW Retro action from
Jean Photography. This action is what gives the red chair that great fire engine red color! I love this action! It fits this photo perfectly!
And there you have it! A beautiful representation of summer worthy of a spot on the wall!!
To see more great "Before & After" photos or to enter your own visit
we picture {this}!


 It's A Small World
 Peter Pan's Flight (I hope Tinkerbell is there because that's all Halle has been talking about!)
 Mad Tea Party
 Swiss Family Tree House (this is from one of my favorite movies ever!)
 Pirates of the Caribbean (LOOK! It's Johnny Depp...I wonder if Orlando will be there too...and I'm not talking about the city!)